Navigate to the Conversations tab in the navigation bar, then click Chatflows. When there, click Create chatflow.
- Firstly, go to the conversations tab and click Chatflows. From there, click at the top right where it says Create chatflow.
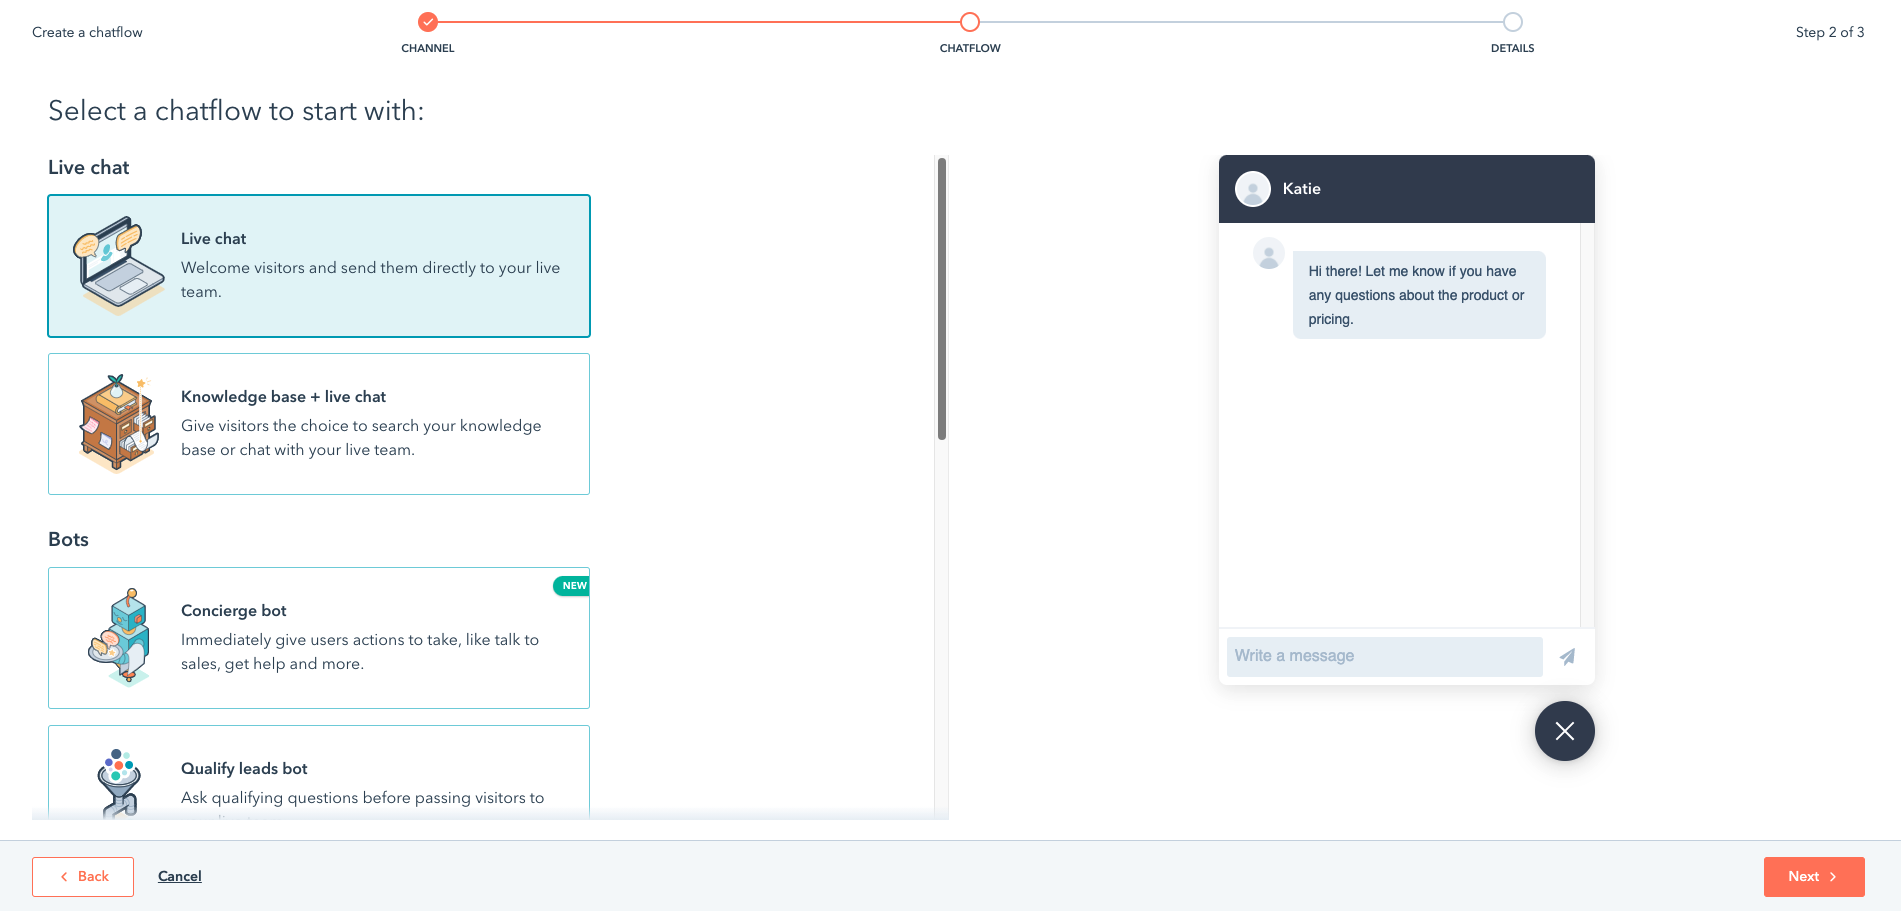
- Select where you would like your chatflow, website being the most common (Please be aware that the next stages of this process are fully customisable and will vary depending on your aims).
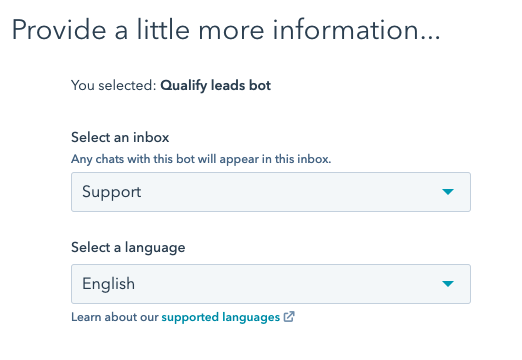
- Select which chatflow goal you have in mind (qualify leads bot is the most used)

- Select the inbox you want to connect the bot to.

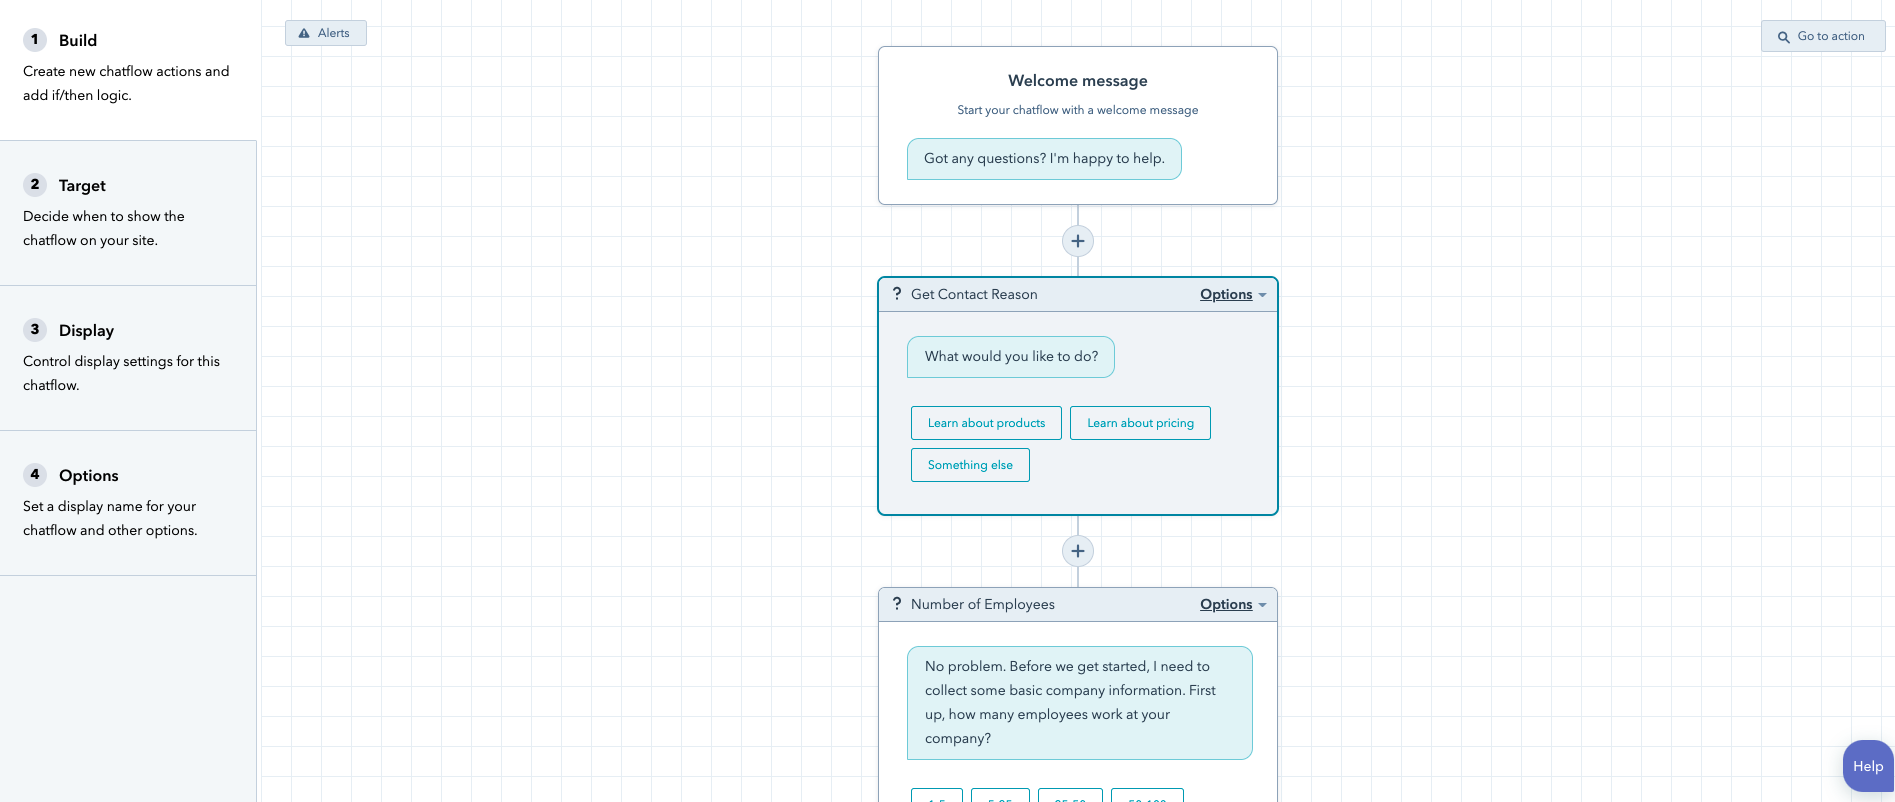
- Click Next and then select what you want your targeted message to be. You can use the default one.
- By clicking the first flow titled Get name you can personalise the message or keep it as the default options. This rule applies to all of the flows in the list.
- At the bottom of the list, select Agent Handoff and assign the relevant members.

- Next, click Targeting on the left-hand side of your screen to decide where you want the chatbot to show on the website, such as the home page. Insert the URL for the chatbot to show on all pages (may vary depending on where the chatbot is needed).
- Under the Display tab, you can edit the display name of the bot and the picture.
- Select your Audience as everyone (this will depend on who you will want to see the chatbot).
- Finally, under Options, you can select settings such as language, availability and set a generic error message.
- When you are finally happy with the settings and flow process of the bot, go to the top right and turn on the switch.
- Finally, now the bot is up and running, you can select Test bot in the top right where you can see how the functionality of the bot works.
- Lastly, you should check the website to see if the bot is live.
- If the bot is not showing up, you need to make sure the HubSpot tracking code is live on your website.
Process complete.
Click here to learn more about HubSpot CMS Hub.
