![Boom Logo White.png]](https://www.bbdboom.com/hs-fs/hubfs/Boom%20Logo%20White.png?height=50&name=Boom%20Logo%20White.png)
In HubSpot you can create and organise dashboard for each team or your personal use.
Please note: the maximum number of dashboards you can have in your HubSpot account is based on the highest subscription tier your account has. For example, if your account has both Marketing Hub Enterprise and Sales Hub Professional, you can have the maximum number of dashboards based on your Enterprise subscription. Review your dashboard limits based on your highest subscription tier in HubSpot's Product and Services Catalog.
Create dashboards
- In your HubSpot account, navigate to Reporting > Dashboards.
- In the upper right, click Create dashboard. You will be transferred to the dashboard library.

- You have the option to select one of the following choices::
- Select from one of the many pre-made HubSpot dashboard templates:
- Click the type of dashboard you want to create.
- Select from one of the many pre-made HubSpot dashboard templates:
-
-
- On the right, review the prescribed reports. Clear the checkboxes next to the reports you don't want to include.
- Click Next.
-
-
- Select New Dashboard to create a blank dashboard with no reports.
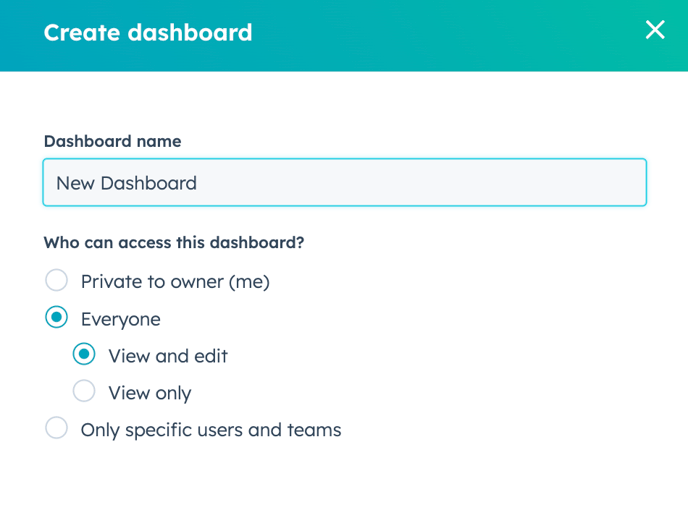
- In the right panel, enter a dashboard name.
- Then set the user access to this dashboard.
- In the bottom right, click Create dashboard.
Once you've created your dashboard, you can add reports to your dashboard and customise it.
- To add a dashboard to your list of favourite dashboards for super quick and easy access, click the favourite star icon next to the dashboard. You can add up to 10 favourite dashboards.
View activity in your dashboard
Multiple users can access and modify a dashboard. If you notice any changes, you can check the activity log to see who made them.
To view the activity log in your HubSpot account, follow these steps:
1. Navigate to Reporting > Dashboards.
2. In the upper left corner, click the name of the dashboard you want to investigate.
3. In the upper right corner, click the Actions dropdown menu and select Activity log.
4. A dialog box will appear, showing you the changes made, the users responsible for those changes, and the timestamps for each modification.
Please note: The activity log only reflects the changes made by users; it does not list all users who currently have access to view the dashboard.